Discover how to make an Outlook email template that changes dynamically based on Excel data. Learn a technique of nesting one template within another.
When dealing with frequently changing information, it can be a real pain to keep all your email templates up to date. But there's is a simple yet remarkably effective solution – combining template shortcuts and datasets.
The basic idea is this: For each data category, such as a specific item in your catalogue or a particular service you offer, you make a separate template and assign it a shortcut. These templates hold general, rarely changing information. Variable details like prices or expiry dates are stored in an Excel table. In that table, you also include shortcuts, connecting the "static" templates to the dataset. This way, you can automatically fill your emails with the most current information whenever you reach out to clients or team members. Sounds too good to be real? Let's break down the process into practical steps:

Discover how to make an Outlook email template that changes dynamically based on Excel data. Learn a technique of nesting one template within another.
Begin by crafting individual templates for different data categories, for example various trips and travels. Each template contains only generic information that doesn't change often, such as tour descriptions or itineraries. Avoid including any changing details like when the tour starts or how much it costs.
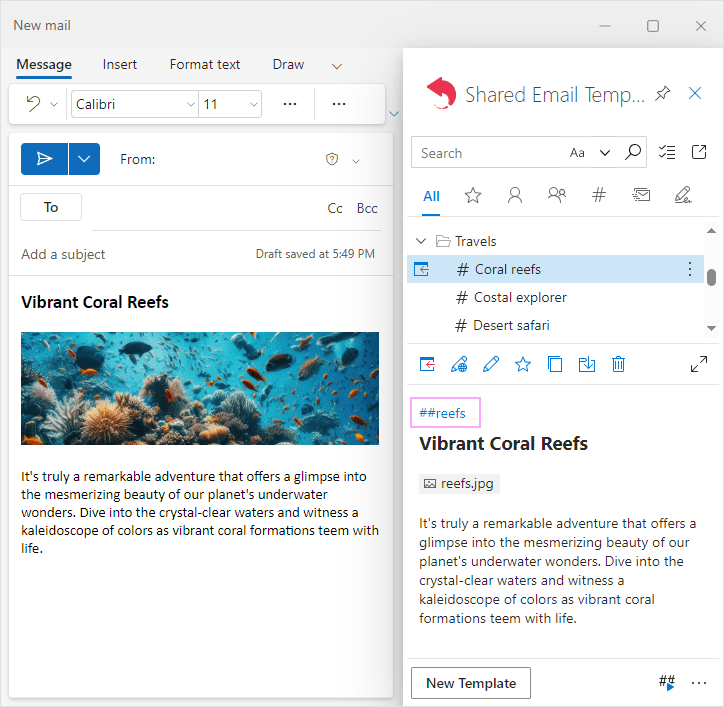
For every template, create its own unique shortcut, so you can access it easily whenever needed. To do this, just click on the ## symbols in the upper-left corner of the preview pane and type in the shortcut name.
These templates can look really nice when enriched with special text styles, pictures, tables, and other elements. In the image below, you can see a sample template for the "Coral Reefs" tour, and how it appears in an email.
For more information, please see How to create template shortcuts.
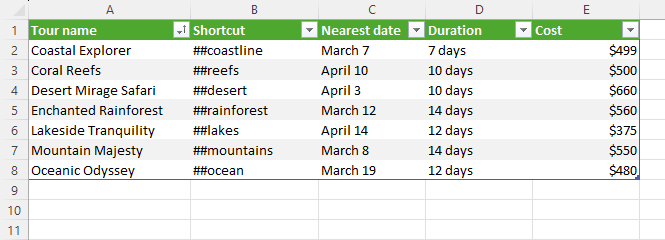
Gather all variable details, such as prices, expiry dates, discounts, and other things like that, into an Excel table. Make sure to place the key values in the leftmost column. These will be the choices in a dropdown menu later, so each value in this column must be unique.
In our case, the first column contains tour names. Each tour has its own row, and each detail – like cost and duration – goes into a separate column. Remember to add a column where you list the shortcuts for the "static" templates, which contain a short overview of each tour.
Tip. Instead of using an Excel table, you can input these details into a simple dataset, which is created within Shared Email Templates itself.
To use data from your Excel table in your templates, you need to create an Excel-based dataset. For this, right-click the target folder in the Shared Email Templates pane, select New Dataset, and then follow these instructions.
Once created, you'll find the new dataset in the selected folder. It will have a green Excel-like icon indicating its connection to an Excel table. In the preview pane, you'll also see the names of the source Excel file and table.
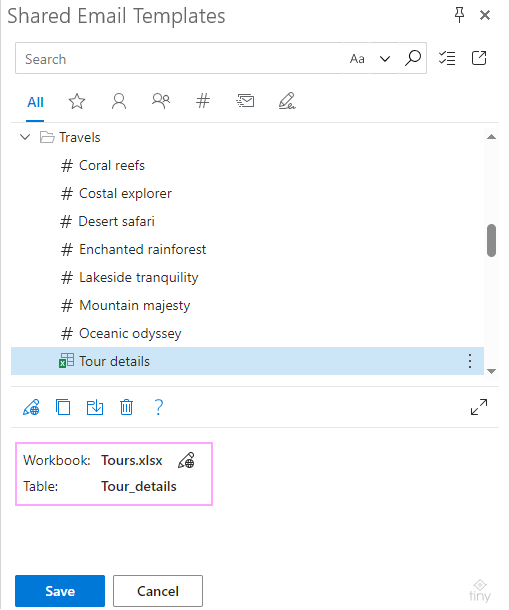
It is important to note that this process does not import data from Excel into Shared Email Templates. Instead, it creates a flexible connection between the two. This means that any changes you make to the Excel table data will be automatically reflected in the dataset.
Now, let's delve into the most exciting part – creating a dynamic template that pulls relevant information from the dataset:
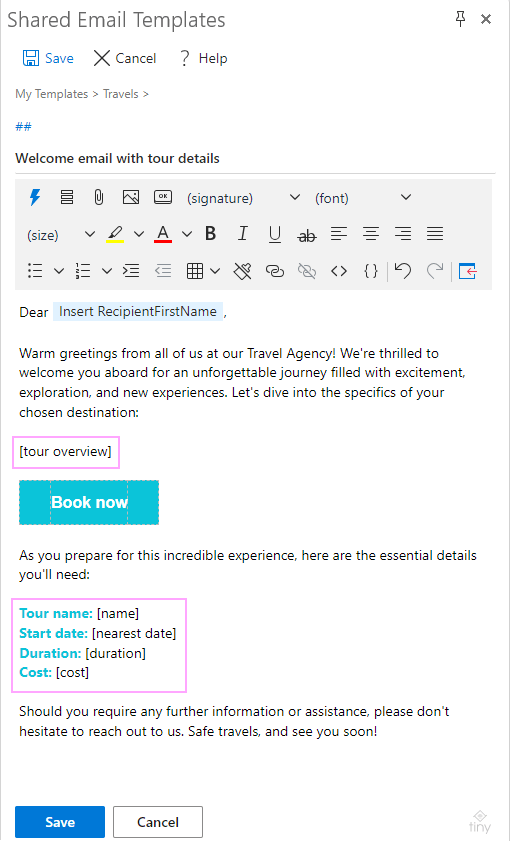
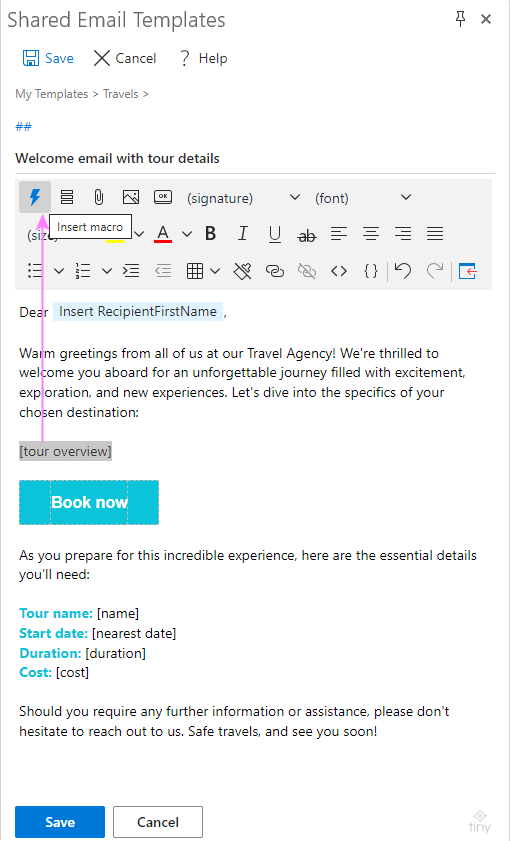
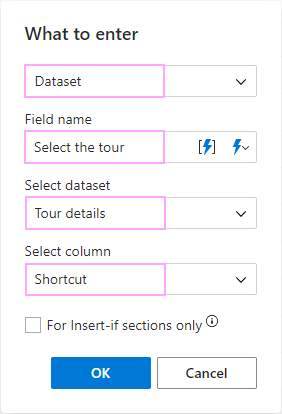
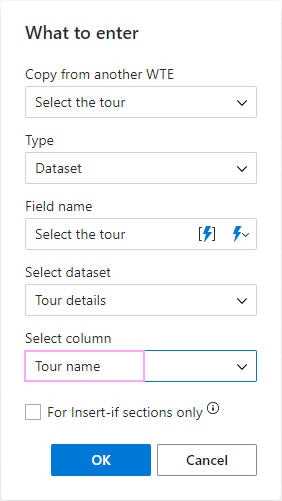
For instance, this is how you set up the macro that inserts a specific tour's shortcut:
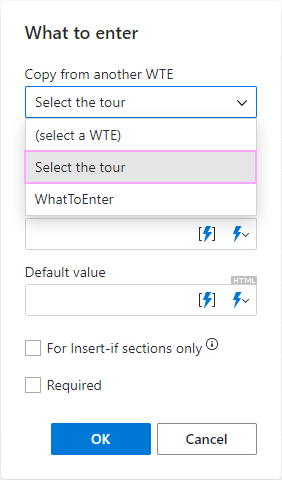
After the macro settings have been copied, don't forget to change the column from which to extract data, such as "Tour name", "Nearest date", "Duration", and "Cost".
When you're done, your template will have several macros, displayed in the DatasetName.ColumnName format in the preview pane:
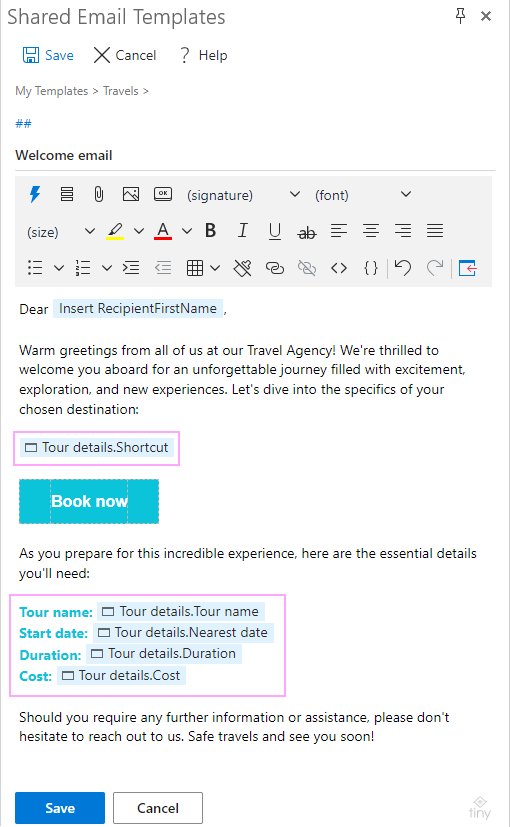
For more information, please refer to How to fill template with dataset values.
And now, test your dynamic template in action and watch the magic unfold :)
When inserting the template into a message, a dropdown dialog will pop up asking you to select the tour:
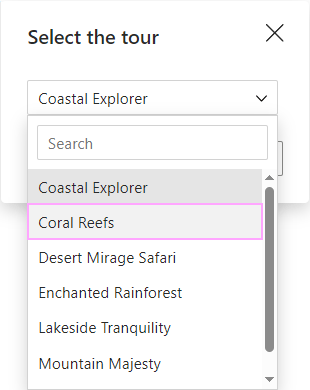
Once you've made your selection, all the relevant details will automatically appear in your message in the right places. The nested template shortcut works quietly behind the scenes, ensuring that the content of the smaller template is also included, with its own text styles, images, and other features.
Here's the cool part: even if your template has multiple WhatToEnter macros referring to the same dataset, you only need to make your selection once.
And there you have it! A welcome email that is attractive and informative, and tailored for your specific recipient:
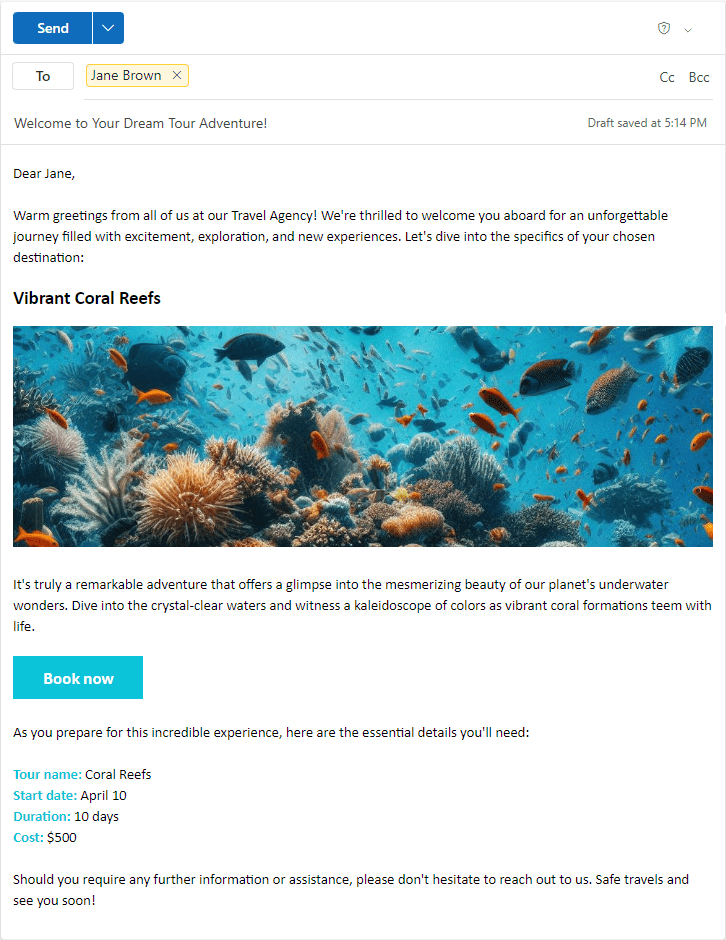
The best thing about this approach is that if anything changes, like a price or itinerary for a tour, you'll need to update it only in one place – either in your Excel table or in the nested template. You won't have to go through all your templates to make the change. Give it a go, and you'll see how easy and efficient it is to manage your templates this way.
Post a comment
Seen by everyone, do not publish license keys and sensitive personal info!